This is most definitely not one of my typical travel blogs, because it's all about a
project and not a trip.
Although some will say "this is quite the trip you are on with this old truck."

The Milkshaker
It all started years ago (long before the Covid times) as we travelled up Highway 1 to Williams Lake and passed the antique Vulture Garage located in Spences Bridge, BC. I liked to stop and look around at what unique cars he might have on his lot, and it gave us a chance to stretch our legs before continuing on. On one of those stops I noticed this old GMC Milktruck at the back of the lot, tucked around the corner with all kinds of junk leaning up against it.


I happened to mention to Norine "that would make a cool project, you don't see many of
them around."
I didn't think much more about it, but I always took a look at it when we made our regular
stop there over the following years. Flash Forward to 2023 and we make our usual stop at
the Vulture Garage, and have a chat with the owner and his puppy. I casually ask him about
the truck, he had plans to make it an Ice Cream truck, but it's too short in the back to
stand up, so it's just sat there. I'd let it go for $1500 he says. Again, I didn't think
much more about it, and we continued up the road.
In May, the Fifty 567 Car Club had a booth at the Coastal Swap Meet, and we were right next to the Vulture Garage's booth. The owner was there and we chatted over the course of the day, I mentioned how we always stop there, and I had been checking out that 56 Milk Truck he had there. Little did I know that at that exact same time, my sneaky wife was exchanging emails with him about purchasing it for me. Apparently she thinks that I may have mentioned this truck a few times over the years, and now it was selling cheap.
August 12th
August rolls around, and it's my birthday again... I open up the Birthday card from my
wife, and inside is these pictures of that truck.
My first response to her was "Are you crazy?" and then it sunk in...


Apparently I am now the owner of a 1956 GMC Stepvan... a Milktruck!


We had to sort out some logistics, such as... where would I put it, how do I get it down
here?
As the warm summer weather was coming to a close, we packed up our backyard pool, and I
setup a covered outdoor garage where we normally store our camper in the winter. My friend
Ben built a power station for me and lent me his compressor, that gave me most everything
I needed to have a working and mostly dry garage space.


When I posted on Facebook that I had received this crazy/awesome gift from my wife, one of the first people to respond was my friend Scott who drives a giant flat-deck up and down B.C., "We can't do anything until after the 20th, but if you're not in a hurry, Tami and I could probably run up there on the 26th to bring it back for you...". Well I guess I know how I'm going to get it down here.
September 23rd
On the morning of September 23rd, I start getting text messages from Scott. The truck I have nicknamed 'The Milkshaker' is being loaded up on to his truck and is heading to it's new home.


It's not pretty, it's got a lot of junk and debris inside, at least what is left of the debris that didn't blow out the back doors on the drive down. But it's here and Scott expertly backed up between the houses and dropped it right in front of our back gate.


Using a come-along and man-power since it hasn't run for a very long time, we winched it back into my makeshift garage, and got to take a really good look at this beast.


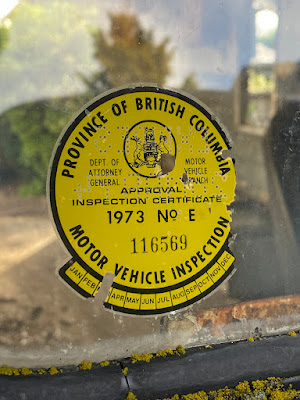


It was a lot to digest, the rest of the daylight hours was just making a list of things to do, and removing the ugly spare tire bolted to the side of the box.

A lot of people have been asking me about the truck, what year is it, is it a Chevy? Here's a couple images to help differentiate the windshield forward part of the truck. It's a 1956, very similar to the 1955 except for some trim pieces between the bumper and the upper grille (mustache). It's a GMC which is the same family as the Chevy, but the GMC trucks had a much beefier bumper/grille assembly.


GMC built the frame and front portion of the truck from the cowl forward, and the back box area (the milk carrying section) of the truck was manufactured by the Grumman Olson company, famous for their many years of custom work vans, delivery trucks and carriers.This particular box was made especially for the Dairyland fleet in 1956.


The other question I get asked a lot about, is what my plans are for the truck, what
will it be?
I thought about this a lot, it's history was as a Milktruck, and I definitely wanted to
pay homage to that, the blue stripes that are visible would be a part of the colour
scheme. The Divco milk trucks that are being resurrected are cool, and I have seen lots of
unique treatments over the years, but I wanted this to be a little different as it was a
unique GMC front end.


When I saw this Lego milktruck, I had my visual muse, and after throwing a lot of different names on the wall, Dairyland, Dairy Queen, Legen-Dairy, Jersey Boys, Milkinit, Spilled Milk... I just liked the way "The Milkshaker" sounded.

Artistic rendering of The Milkshaker
Milkshaker Update #1:
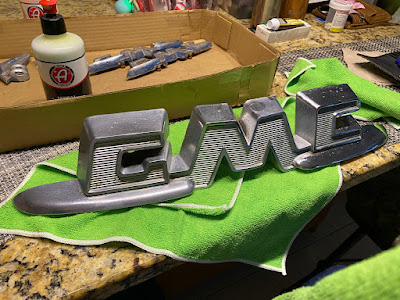
Today was a day of cleaning up years of junk, broken glass, debris and old wasp nests. I also temporarily added the GMC hood emblem and headlight frames to see how it looks.


Milkshaker Update #2:
Today was bath day, and I think she weighs about 100lbs less. Removed the old headliner and found more wasps nests, including 1 with half a dozen live yellow jackets in it


Milkshaker Update #3:
Taking a little break from deconstruction, we took a road trip to Alberta. We rented a truck, and hauled a cherry picker across the border to remove and take home a 350 motor that my nephew was donating to the Milkshaker project.


In the nearby town of Penhold is an excellent resource for old truck owners, Scott's Super Trucks. I acquired a bunch of shiny pieces, and also learned a bunch of things about my vehicle from their extremely knowledgeable staff. I took one of their catalogues home, I may have to make some more purchases.


The removal of the engine went way faster than expected, having extra hands that just dive right in, really sped up the process.


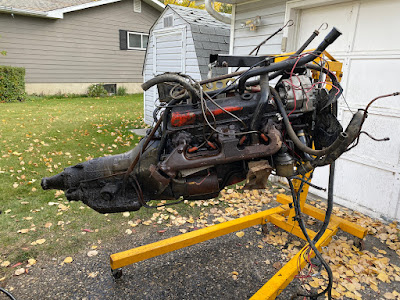
A couple days of spray on engine degreaser, a visit to a pumpkin patch and a tourist afternoon in Sylvan Lake along with some family visiting time, and we were heading back home with a new heart for the Milkshaker.
Milkshaker Update #4:
It's been a couple days of cleaning up the donor motor, removing the old seat, and starting to dismantle all the dash and wiring madness behind itÖ


Milkshaker Update #5:
People ask me how much wiring could there possibly be in such an old truck?
I acquired an American Autowire kit from The Old Car Centre, and it will replace all of the wiring, all I needed to do was get all of the old wiring out.


This box of old wires is much fuller now.


Milkshaker Update #6:
A few days of skinned knuckles, broken bolts, rounded nuts and seized rusty fasteners, I had a good portion of the front end disassembled. One step closer to removing this 67 year old straight 6 engine.


Milkshaker Update #7:
When it rains, you work on inside projects. I combined several gauges into 1 nice one with a set of 4 new modern small gauges.† Networking is invaluable in the Old Car restoration world, and I managed to find a rare GMC dashboard from my friends in the 55-59 GMC Facebook group. The truck came with one that had a Chevy bowtie logo, and it just didn't seem right.


It looked way better, but functionality is important too, and the original gauges didn't provide much information, were very basic with an ampmeter, an oil fed pressure gauge and most likely 67 years of decay. So using some very scientific methodology, I figured out what would fit well in the cluster windows by holding my phone screen behind the holes, and found a set of gauges that would still display the key info. Then I removed them from the case, and started chopping/grinding and filing to get them mounted to the old cluster case.


It's a bit of a process lining things up, and ensuring the connections are accessible, let's just say it's good if no-one looks behind the cluster once it's mounted.


Pretty happy with how it turned out, and look forward to seeing how my GMC branded dashboard cluster looks in the truck.
Milkshaker Update #8:
If itís still raining outside, may as well make some shiny bits more shiny and fill in some of the long lost colour.


One afternoon when the rains stopped, I went hunting for parts at a few of our local wreckers. After having one place laugh at me trying to find parts for my truck, I ended up at a place that had a couple Stepvans in their yard. There wasn't much I could get from them, but I did acquire a windshield wiper system.


Another place called 99 Truck parts which I have been driving past for years without paying any attention to, had a treasure chest of old parts, including a huge selection of mirrors to replace the rusty monstrosities on the Milkshaker.


Milkshaker update #9:
The truck has been put on a low iron diet as she needed to lose some weight. My friend John helped me cut off some excess back end weight, I removed the toilet, water tank, exhaust and the old 235 straight 6 engine. Then she got a much earned bubble bath under the non-existent hood.


Getting the motor out wasn't easy, but figuring out that you just need a slight twist of the collar to remove the shifter made it easier.


Anything underneath that wasn't necessary got removed, including the gas tank, the exhaust and the parking brake system, which is a brake that clamps onto the tail end of the transmission.


Some more broken bolts and the old 235 Straight Six motor is ready to come out.


One of the big challenges was removal of this transmission crossmember, it had to come out but the steel rivets holding it in place were very stubborn, my friend Callum showed up and helped me get through the last few rivets and cut this piece out.


There is lots of room now for the V8 engine that will eventually power the Milkshaker.

Milkshaker Update #10:
I havenít updated in a while because itís been a lot of little things and behind the scenes progress. As the weather changes I have shifted focus to getting inside gutted to see what metalwork needs to be done.

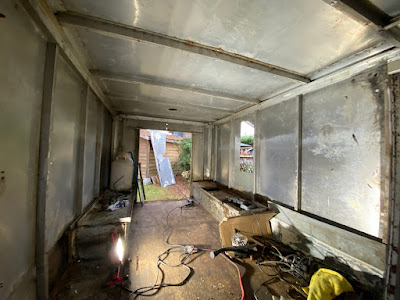


Callum and I discussed looked at different doors on older trucks with various options and devised a back door plan, so I ordered the necessary latching hardware and hinges. We'll get to the building phase soon.


I cleaned out all the remaining panels and put in a temporary door to keep the weather out, at least until we get the actual doors made and installed. Now my portable radiant heater can keep me warm while working inside.

After getting the 350 motor cleaned up, I did a leakdown test on the cylinders before investing any time and money into the engine. the leakdown test basically fills each of the 8 cylinders with 100psi of air, and then measures the loss to see how it's sealing. A good cylinder is typically in the 75-80+ range. The first two cylinders I tested were both at 80, then a 64, and a 72, that's not terrible for a 40+ year old engine. Sadly, the other side came up with 40, 76, 82 and then 0! That's not good.


The cost to redo the cylinders, pistons, heads and everything else needed to find and repair the issue just didn't make sense. Another friend of mine was selling a 305 motor that had already had a lot of that work complete. The 350 motor has now become a newly rebuilt 305 engine that will be assembled over the next while at my friends garage.


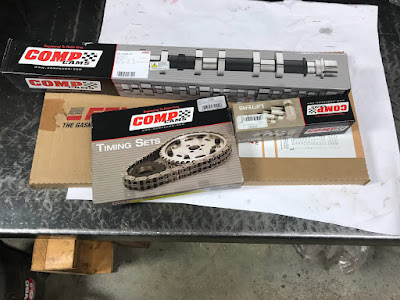
I am able to re-use a lot of the components from the 350 on the 305 as they are both standard small block chevy, and made a trade of the old block in exchange for getting the heads assembled and acquiring some new engine components (lifters, timing set, cam).



Milkshaker Update #11:
It can get a little frustrating when all you seem to be doing is de-constructing, but this weekend I actually attached a piece using solid rivets, until my borrowed compressor died. So I shifted gears to do some welding, stripping and repairing. Combine that with the arrival of some very cool pieces and rear door hardware, I finally feel like Iím making forward progress.
One of my big tasks is to restore the jacknife style front doors, they are a real mess, even if they still operate. So leaving the passenger side intact to use as a guide, I dismantled the drivers side, and John welded up the door lever handle bracket, which was broken.


Dismantling is not just the removal of old rusty screws and bolts, these are aluminum panels, and everything is fastened using solid aluminum rivets (and then a bunch of rusty screws and bolts that were hodge-podged over the years). So it involved a ton of grinding, drilling and punching to get it all dismantled.


There is definitely going to be some welding, replacing and repairing of metalwork both on the doors and the surrounding box framework. Overall it's pretty good, but there is a few trouble areas.


Did I mention that I got an amazing deal on a welder, I'm going to need it.


Today really felt like a progress day, instead of just removing and cutting out pieces, I actually added a new piece to the Milkshaker, the very first new piece!!! It's a 72" long aluminum piano hinge that will hold up the rest of the door. At least I got 3 rivets attached before my compressor failed. Don't despair, it pays to have friends.


